Here's the thing: 75% of online shoppers say product photos are the main factor in their buying decision. Not the description. Not the price. The photos. And if yours look like they were taken in a hurry on a cluttered kitchen table (no judgment, we've all done it), you're probably leaving money on the table.
But don't worry. You don't need a fancy camera, a photography degree, or a dedicated studio space. In this guide, I'll show you exactly how to transform your product photos from "meh" to "add to basket", even if you're just using your smartphone.
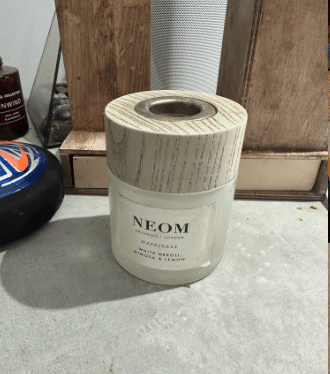 Before
 After
After
Same product. Same phone. Completely different impression.
Why Good Product Photos Actually Matter
Before we dive into the how, let's talk about the why. Because understanding this might just change how you approach every listing you create.
When someone's scrolling through hundreds of listings, your photo has about half a second to make an impression. A cluttered background, dodgy lighting, or unflattering angle? Swipe. Gone. Next.
But a clean, professional-looking image? That stops the scroll. It builds trust. It makes buyers think: "This seller knows what they're doing." And trust translates directly into sales, and higher prices too.
The Basics: What Makes a Good Product Photo?
Alright, let's get practical. Good product photos come down to four things:
1. Lighting (The Big One)
Lighting is honestly 80% of the battle. Bad lighting makes even expensive products look cheap. Good lighting makes a £5 charity shop find look like it belongs in a boutique.
Natural light is your best friend. Position yourself near a window (not in direct sunlight, that creates harsh shadows). Overcast days are actually perfect because the clouds act like a giant softbox, giving you that lovely diffused light.
Take photos between 10am and 2pm when natural light is strongest. If you're stuck photographing in the evening, a cheap ring light (£15-20) can make a huge difference.
2. Background (Keep It Clean)
That pile of laundry in the background? The random mugs on your desk? Your cat's tail photobombing? Buyers notice all of it. And it screams "amateur."
The goal is a clean, uncluttered background that puts all the focus on your product. White is the classic choice, it works for almost everything and is what most marketplaces prefer. A piece of white posterboard from a pound shop works perfectly.
Or... you could skip this entirely and let AI handle it (more on that in a bit).
3. Angles (Show the Full Story)
One photo isn't enough. Buyers want to see:
- Front view, the main "hero" shot
- Back view, especially important for clothing and electronics
- Detail shots, labels, tags, textures, special features
- Scale reference, help buyers understand the size
- Any flaws, if you're selling used items, showing flaws builds trust
Aim for 5-8 photos per listing. Listings with more images consistently get higher engagement and faster sales.
4. Presentation (The Little Details)
Is your product clean? Is clothing wrinkle-free? Is that phone screen fingerprint-free? These details matter more than you'd think.
A quick steam, a wipe-down, or a bit of reshaping can transform how a product photographs. Five minutes of prep can add pounds to your final sale price.
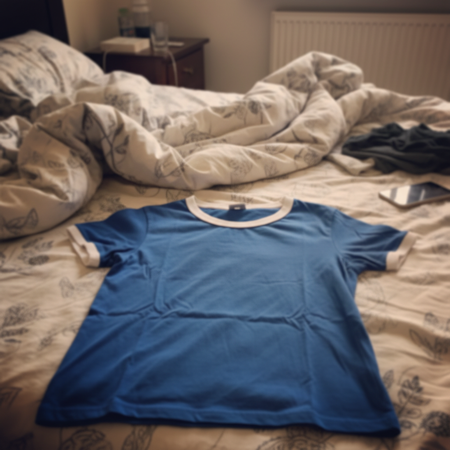 Before
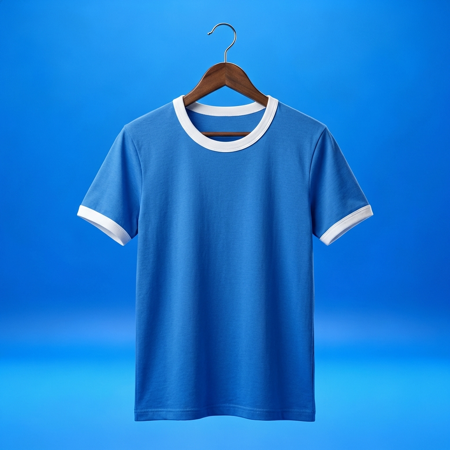 After
After
The Traditional Approach (And Why It's a Pain)
Now, the "proper" way to get professional product photos traditionally involves:
- A lightbox or mini photo studio (£50-200)
- Artificial lighting setup (£30-100)
- Photo editing software and skills
- Hours of your time setting up, shooting, and editing
And honestly? If you're photographing hundreds of items, all that setup time adds up fast. There's got to be a better way, right?
The Modern Approach: Let AI Do the Heavy Lifting
Here's where things get interesting. AI has completely changed the game for product photography. Instead of spending ages setting up perfect lighting and backgrounds, you can now:
Snap a Quick Photo
Use your phone, wherever you are. Kitchen table? Fine. Messy bedroom floor? It'll work.
Let AI Transform It
AI removes the cluttered background, fixes the lighting, and creates a professional studio look, in about 30 seconds.
Download and List
Get your enhanced photo and upload it straight to your marketplace of choice.
It's not cheating, it's working smarter. The end result is what matters, and buyers can't tell (and don't care) whether you used a £500 lightbox or a clever AI tool.
A basic lightbox costs £50-200. A decent ring light another £30+. Then there's the time to learn editing. With AI tools like SnapSell.photo, you can get 100+ professional photos for less than the cost of that equipment, and it'll be gathering dust in a cupboard by next month anyway.
Quick Wins: Improve Your Photos Today
Whether you go the traditional route or use AI, here are some quick wins you can implement right now:
- Clean your camera lens, seriously, you'd be surprised how many blurry photos are just from a smudgy lens
- Hold your phone steady, or better yet, prop it against something
- Turn off flash, phone flash creates harsh, unflattering shadows
- Get closer, fill the frame with your product
- Take multiple shots, you can always delete the bad ones
- Check focus, tap on your product on the phone screen to ensure it's in focus
Platform-Specific Tips
eBay
eBay recommends white or light grey backgrounds with your product filling 80-90% of the frame. Square images work best. Aim for at least 500x500 pixels, though 1600x1600 is ideal for the zoom feature.
Etsy
Etsy's more forgiving with creative backgrounds, but your first image should still clearly show the product. They recommend a 4:3 aspect ratio and at least 2000px on the shortest side.
Vinted & Depop
These platforms are more casual, but that doesn't mean sloppy photos fly. Clean backgrounds still win. Flat lays (photographing from directly above) work brilliantly for clothing.
Amazon
Amazon has strict guidelines, main images must have a pure white background (RGB 255,255,255). Product must fill 85% of the frame. No text, logos, or watermarks. AI tools that create true white backgrounds are especially useful here.
Common Mistakes to Avoid
- Using the wrong aspect ratio, check what your platform prefers
- Over-editing, buyers want to see what they're actually getting
- Inconsistent style, keep your photos looking cohesive across your shop
- Forgetting scale, include something for size reference when it matters
- Low resolution, grainy photos look unprofessional and hurt zoom features
Frequently Asked Questions
No! Your smartphone camera is more than capable. Modern phones have excellent cameras. The key is good lighting and a clean background, or using AI tools to fix things up afterwards. A £1000 camera won't help if your lighting is rubbish.
A clean white or neutral background works for almost everything and is what most marketplaces prefer. It puts the focus entirely on your product. If you can't set up a proper white background, AI tools can remove cluttered backgrounds and replace them with studio-quality settings.
Aim for 5-8 photos minimum. Include the front, back, sides, details, a size reference, and any flaws (if selling used). More photos generally mean more buyer confidence. Listings with more images consistently get higher engagement.
It depends on your volume and patience. If you're listing 5+ items a day and have space for a permanent setup, maybe. But for most sellers, the setup time, storage space, and initial cost make AI alternatives more practical. You can process more items faster without the hassle.
Absolutely. Modern AI can remove backgrounds, fix lighting, and create studio-quality settings that are indistinguishable from "real" professional photography. The technology has come incredibly far, buyers genuinely can't tell the difference.
Ready to Transform Your Product Photos?
Stop struggling with lighting and backgrounds. Let AI create stunning, professional product photos in seconds.
Try SnapSell.photo FreeThe Takeaway
Good product photos aren't about expensive equipment or photography skills. They're about understanding what buyers need to see and presenting your products in the best possible light (pun intended).
Whether you go the traditional route with careful staging and lighting, or take the modern approach with AI enhancement, the goal is the same: photos that stop the scroll, build trust, and make people want to buy.
The sellers who get this right consistently sell faster and for higher prices. And now you know exactly how to join them.
Happy selling! 📸